Stoveless backpacking isn’t for everyone… That said,
I Leave my stove behind on most backpacking trips these days.
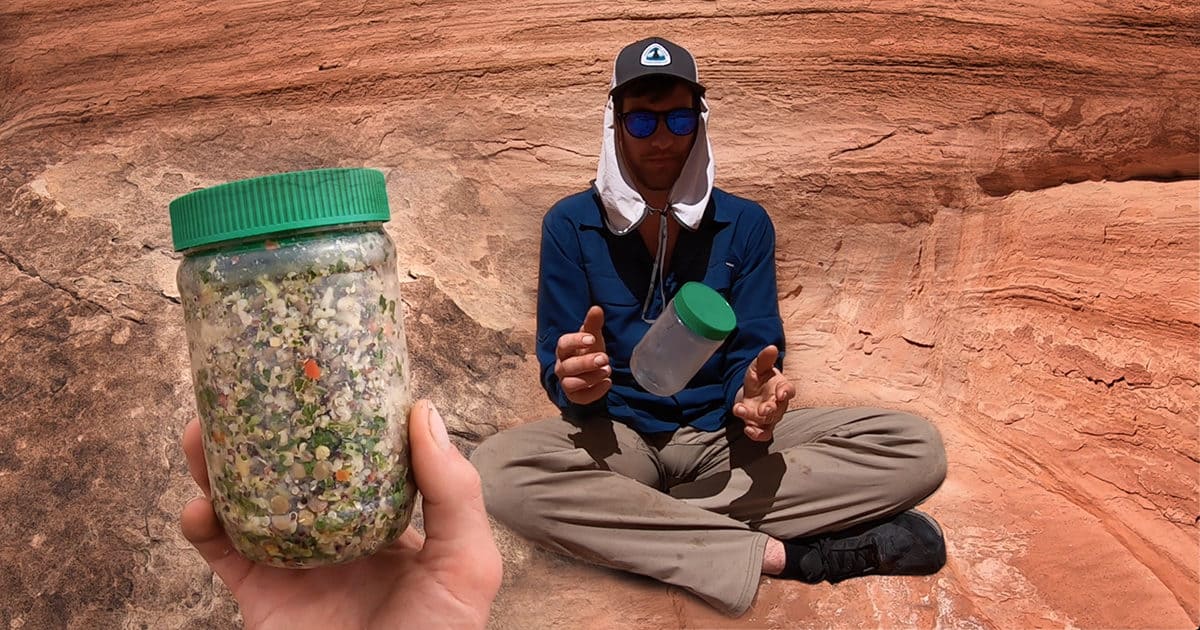
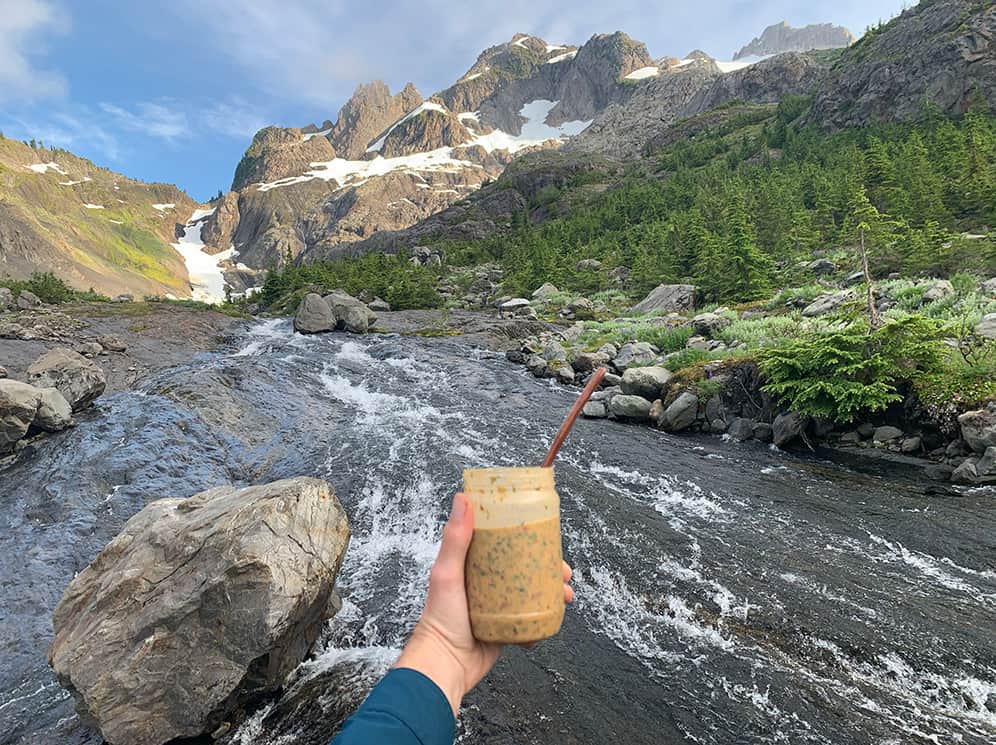
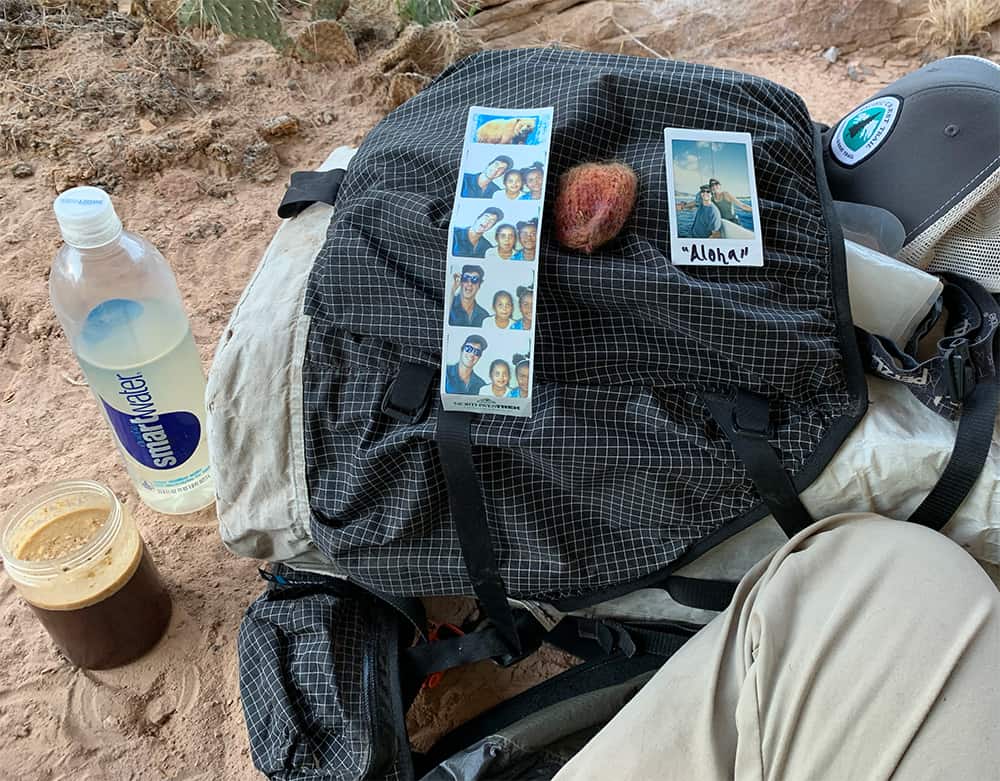
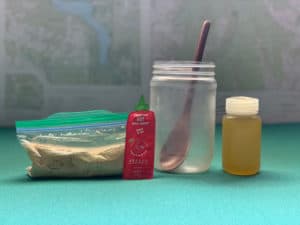
I’ve eaten 100’s of AWESOME stoveless backpacking meals out of my peanut butter jar pictured above.
In this guide you will learn:
- Why I LOVE cold soak backpacking meals
- What the BEST cold soaking container is
- My favorite stoveless backpacking recipes
- How to make stoveless coffee
Page Contents
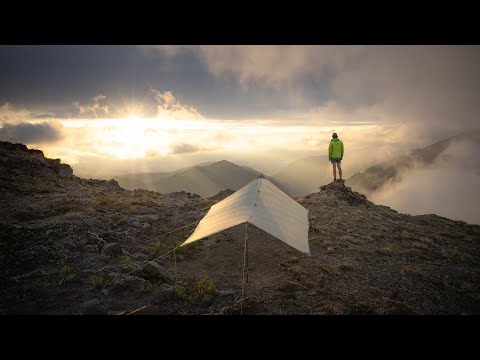
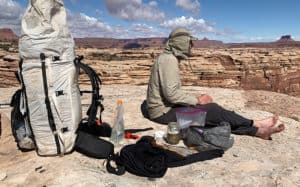
Stoveless Backpacking Videos
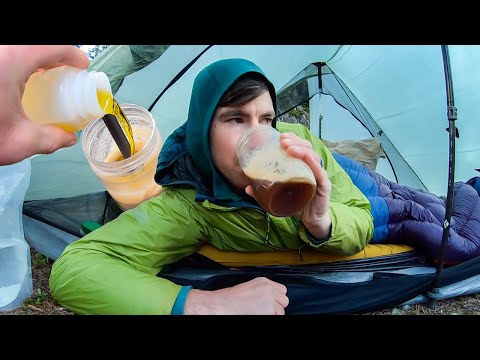
See how I make my coffee, breakfast, lunch & dinner in my cold soaking container.
Get an inside look at 7 days of backpacking food that I bring into the backcountry.
My Best Backpacking Food Guide is a great supplement as well.
Best Cold Soaking Container
- Has the capacity to hold the contents of any meal you plan on making.
- Lightweight
- Reusable
- Has a watertight resealable lid.
You can get pretty creative here. These are my TOP recommendations:
Peanut Butter Jar
This is my personal favorite and my current go-to. I use this extra-large 26 oz jar.
It’s the perfect size to carry my largest meals. I’ve never had it leak on me either.
Plus it has a complementary shape for drinks.
Get a free PDF of this entire guide.
Bonus cold soak recipe included in PDF. 🙂
Emails are never shared. Unsubscribe at any time.

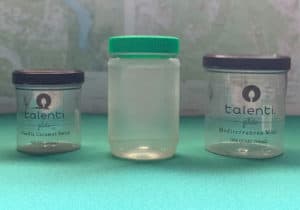
Talenti Ice Cream Container
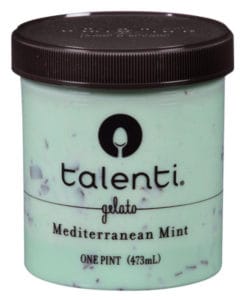
This is a great container to hydrate meals in.
The small container has a capacity of about 16 oz. The large size holds about 32 oz.
I personally find the sweet spot to be right in the middle.
After testing this one out on a few backpacking trips…
I came to the conclusion that my peanut butter jar was a better option.
Close second. Good ice cream though. 🙂
Vargo Titanium BOT
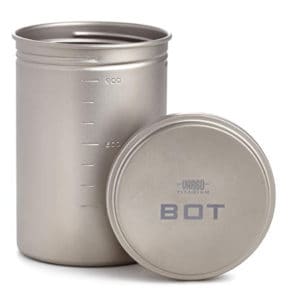
This is an IDEAL OPTION for those that want to do a combination of cold soaking and cooking on the trail.
The titanium design allows you to use this on a stove or a fire.
It weighs in at 4.8 oz making it more than double the weight of most plastic cold soak containers.
Benefits of Going Stoveless
There are TONS of benefits to cold soaking.
Most hikers don’t cold soak because they prefer the taste of a cold meal over a hot one…
They do it because the PROS outweigh the cons.
Weight Savings
You can easily knock 1 – 2 pounds off your base weight by leaving the stove and fuel behind.
This can be ESSENTIAL on longer trips.

A cold soak container weighs just a fraction of what a stove and pot weigh.
Let’s break it down.
My personal Jetboil MiniMo cook system weighs about 14 oz. A full can of fuel weighs about 8 oz.
That’s about 1 pound 6 oz total weight.
My empty large peanut butter jar weighs in at 2.1 oz.
Simplicity on the Trail
To cold soak, all you need is a container.
No need to fuss around with your stove, pot, fuel and a lighter. You’re also not left to BABYSIT your water as it boils.
I find fuel to be the most inconvenient thing to obtain before my hikes.
In fact, most of the time I go to R.E.I, it’s only because I need to pick up new fuel canisters.
Easier Cleanup
Do you like cleaning up the burnt bits of food that are stuck to the bottom of your pot? Of course, you don’t.
Cleaning a cold soak container is far more convenient than cleaning out a crusty pot.
Here’s how I like to clean my cold soak container:
- Pour some water into my container.
- Put the cap back on.
- Give it a good shakedown.
- Drink the contents.
Not only are ZERO calories wasted here… I’m also not leaving ANY remnants of food behind.
This has a better impact on the environment.
Avoids Strong Odors Caused by Cooking
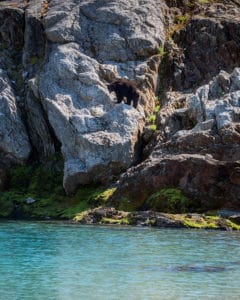
The smell of your hot chili mac could be pulling in every bear in a 2-mile radius.
All animals for that matter. Why not avoid that all together?
This is especially critical if you are hiking in Grizzly Bear territory.
Even if you cook your meals away from camp the odors can still penetrate into your clothes while cooking.
Animals are much more attracted to those odors that your own personal scent.
Meal Snacking
Many hikers find it ideal to snack throughout the day instead of cooking a meal for lunch.
Having a watertight lid on your container enables you to hydrate a meal and eat in increments as you take breaks throughout the day.
Now you’re not limited to snacking on bars & trail mix.
Cheaper Than Using a Stove
A cold soak container costs practically nothing, much cheaper than buying a stove & a pot.
Your real savings though comes from not having to constantly purchase fuel.
HIKE MORE, work less.
Cold Soaking Tips
• I find most meals hydrate properly in about 20-60 minutes. Unlike cooking, it’s pretty tough to over hydrate your meal.
• I like to start my cold soak meal at least 1 hour before I plan on eating.
• Choosing a container with a watertight lid enables you to hike while your meal hydrates in your backpack.
• Setting your meal out in the sun will speed up the hydrating process.
• Periodically give your container a good shake as your meal hydrates. This will ensure that your meal hydrates evenly.
Stoveless Backpacking Meals & Recipes
These are my personal FAVORITE cold soak meals.
Breakfast
I like to mix a blend of various nuts, oats, seeds, berries, and coconut milk powder together.
This is a DELICIOUS healthy powerhouse of a breakfast.
The recipe below has a sweet coconut chocolatey taste. I find it to give me far more energy than any bars or other “breakfast meals” I’ve tried.
“Power Soak” Breakfast Meal
This recipe packs about 700 calories and it’s great to eat at any time of the day.
- 3 Tbsp Coconut Milk Powder
- 2 Tbsp Rolled Oats
- 2 Tbsp Walnuts
- 2 Tbsp Chia Seeds
- 2 Tbsp Shredded Coconut
- 2 Tbsp Dried Mulberries
- 2 Tbsp Hemp Seeds
- 2 Tbsp Cacao Nibs
This one can be eaten right after adding water. No need to wait around for it to fully hydrate.
Personally, I prefer the texture of this one barely hydrated.
Coffee
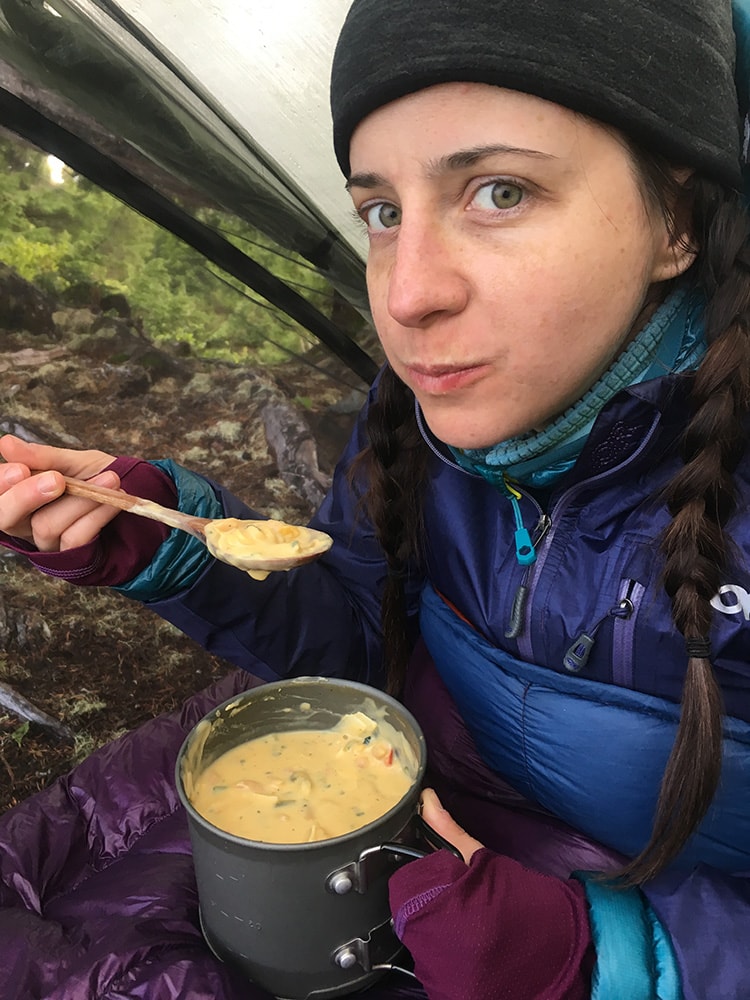
Enjoying a cold soak instant coffee with some of the people I LOVE most.
My FAVORITE cold coffee combination:
This blend is too good!
There is a downfall to the ease of making this coffee without a stove…
I find myself drinking more cups than I normally would.
Matcha Tea
This is an awesome alternative for those that prefer tea over coffee.
Matcha Tea comes in powder form & can be easily mixed with cold water in your cold soak container.
Turn your tea into a mini breakfast by adding a few scoops of the coconut milk powder I mentioned above.
Coconut milk powder packs 225 calories per ounce. Plus it gives your drink a sweet creamy taste. This stuff is a staple for me.
Lunch
For all of those hikers that prefer a mid-day “meal”
Hummus & Chips
This is one of my favorite combos! You can see how I make this by watching the video at the top of this guide.
Amazon has some good Powdered Hummus options to choose from. Just add water and mix.
I like to boost the calories & kick it up a notch by adding:
- Olive Oil
- Sriracha
I find pita chips & corn chips to go best with hummus.
Often my chips get pretty smashed up in my backpack while hiking… That’s ok, I just throw handfuls of my microchips into my container after I mix my hummus & dig in with my spoon.
P.S. This Tiny Nalgene Bottle is excellent for holding olive oil. Haven’t had it leak on me yet.
Backpacking Wrap
Many backpackers find a loaded Tortilla Wrap to be an awesome lunch on the trail!
This is an especially good fit for those buying food at the grocery store before their trip.
Tasty things you can add to your wrap:
- Avocado
- Tuna
- Sardines
- Peanut Butter
- Hard Cheese’s
- Hard Meat’s
- Smoked Salmon
Hard cheeses such as parmesan (my favorite) or extra sharp cheddar hold up the best in warmer conditions. You’re better off going with small blocks as opposed to something pre-sliced.
Choose meats that don’t require refrigeration. Salami holds up extremely well on the trail.
A couple of small pieces of beef jerky can really add to the deliciousness of your wrap.
I also find that vegetables such as peppers, or leafy greens (awesome additions to a wrap) will hold up well for the first day or two on the trail.
Pro tip: Stock up on some free condiment packets (mayonnaise, mustard, ketchup, etc) at the deli section of the grocery store.
Be the first to know when I release more free in-depth guides & backpacking recipes 🙂
Dinner
These backpacking meals are also great cooked on a stove. 🙂
Cheesy Broccoli Rice
This one is a crowd-pleaser and is super easy to make.
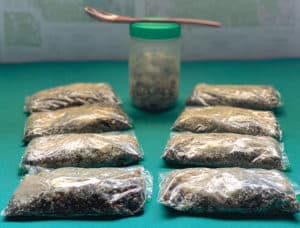
In a sandwich size Ziploc bag mix together:
- 6 oz Instant Rice
- 1 Tbsp Cheese Powder
- 1 Tbsp Butter Powder
- 2 Tbsp Dehydrated Broccoli
- Salt & Pepper
Variations:
• I personally like to replace the instant rice with a combination of rice, lentils and quinoa I dehydrated myself.
• You can DOUBLE the amount of cheese and butter for added calories & taste.
• Replace the broccoli with any vegetables that you find fit.
I really like Harmony House’s assorted Vegetable Box. More options and bang for your buck.
Backpacking Curry
A little bit of spice will warm your cold meal right up.
In a sandwich size Ziploc bag mix together:
- 6 oz Instant Rice
- 3 Tbsp Coconut Milk Powder
- 1 Tbsp Curry Powder
- 3 Tbsp Assorted Vegetables
- Salt & Pepper
After the meal has hydrated throw in a handful of peanuts or cashews.
Variations:
• This one is great with a 50/50 mix of Quinoa & Rice
• You can definitely go with a little more or less of the curry powder.
PS: I’ve tried a lot of curry powders and the one linked above is the BEST.
Cheesy Chicken Couscous
- 1 Packet Parmesan Near East Couscous
- 1/2-1 Foil Pouch Chicken
- 1 oz Olive Oil
- Salt & Pepper
I find that the ideal amount of water for all of the meals mentioned above is going to depend on the consistency that you find best.
To keep things simple in the field, I never take any actual water measurements.
I like to add all of the ingredients into my cold soak container & fill with water until the water line is about an inch above the contents in my jar.
Is Stoveless Backpacking Right For You?
Hard to say.
If you have read this entire article and are still on the fence about it…
I’d say GO for it. See first hand if it’s a good fit.
I know I talked it up pretty good in this article… That said, if it’s going to be cold or wet I really prefer the morale boost of a hot meal or drink and I bring my stove.
So…What Do You Think?
Have you tried stoveless backpacking before?
If so I’d LOVE to hear about some of your favorite meals or tips not mentioned in this guide.
Leave a comment below.
HAPPY TRAILS.
Hi Iron! After reading your post last year, I have been cold soaking my meals ever since. I really like it! I have been using a plastic peanut butter jar (28 fluid ounce capacity) that weighs 2.1 ounces. It has never leaked and that size meets all of my needs as a solo hiker.
In addition to the weight/volume savings, I like how much time I save by not having to cook anything. I do get strange looks from the people who prefer a hot meal, but this works for me.
Thanks for your great posts!
Tim
Plymouth, MA
Hi Iron,
We love your videos and your cold soak ideas. We especially love how healthy they are and want to incorporate them on our future backpacking adventures. I was just wondering if you could give us some guidelines on how you dehydrate your rice, lentils and quinoa? Not sure the proportions to use and how you dehydrate them. We would love it if you could share any tips for this. Keep inspiring us! You are awesome!
Hey Kimberly!
You’re awesome! I cook & dehydrate large batches of those ingredients on their own in my Excalibur dehydrator. Should be able to look up proper times for individual ingredients for most dehydrators online. I then store them in large mason jars & they are ready to go anytime I need them (In my experience they stay fresh for over a year going that route). As far as portions go that really depends on how much you want to eat. I’d start with a base of about 6 ounces total (dehydrated) per meal and adjust from there. I’d also recommend experimenting at home and getting the perfect meals dialed in before your trip. Hope that helps & hope you get out on some great trips.
I’m trying my first cold soak meal today (at home). Thanks for the recipes and ideas! I plan to try cold soaking on the trail soon. I’m especially excited about the breakfast idea. Sounds delicious!
Yay! Hope you enjoy it & appreciate you dropping in to leave a comment
I’m planning to hike the PCT next year and I’m trying to learn as much about cold soaking as I can. I’ve always been a ‘low maintenance’ culinary guy, so going without a stove is a no-brainer. Great article here, and one I will continue to reference as I get deeper into this topic.
That’s so awesome to hear. I really hope you are able to hike the PCT & enjoy some cold soaks along the way!
Hey, did you have a favorite curry lentil recipe?
You could easily follow my backpacking curry recipe on this page & swap the rice out for lentils.
Thanks for this post! I am planning on going stoveless on the JMT this summer so I don’t have to carry my Jetboil and extra fuel. I have only done cold soaked oatmeal and couscous so far and was looking for a good lunch option. I love hummus and am going to order some of that powder! I think it’s going to be great ☺️
So happy you enjoyed the post. I’d recommend experimenting at home before your trip to see what you like best. Good luck on the JMT. Such an amazing trail.
I want to share my experience with food for the trail.
Here are resources I found:
I am keto, and I like You Tube Dr. Mindy Pelz recommendation about intermittant fasting schedule over the week or 10-days.
I like Aaron’s backcountryfoodie.com website for recipes, and clients can find the professional services there. I use the members area, but the open public area is sufficient for most.
I love your website.
I can recommend Gear Skeptic, here, at YouTube for the entent of detail you may be looking for.
I cross-reference my keto, intermittent fasting ‘eating window’ and d’Adamo genotype Swami highly recommended and food selections to avoid, with Aaron’s backcountryfoodie.com website and Gear Skeptic video series.
I printed out his PDF’s.
It is my experience this combined knowledge makes my entire experience better, and reduces the weight and volume carried because I get more mileage performance and endurance by optimizing all these things for me.
There may be useful information for you.
Hey Connie!
Thanks so much for all of this great information. Happy trails my friend.
I cold soak my food in the ziplock bag the food is stored in and eat it right from the bag. No dirty jar. If I have to carry it in my pack and worry about leaking I double bag it and keep it in an outer pocket.
Iv’e definitely pulled that move myself. Super ultra light weight move right there. Happy Trails!
Really enjoyed reading this article. But I do agree that for cold or wet days, I need a hot meal! Love your YouTube channel and your blog.
Thanks a ton my friend! Happy Trails.
Thanks! Can’t wait to try these recipes. What a great option!
Thanks so much. Enjoy!
This is so cool! I really enjoyed your video, made me feel even more excited to get out once the current pandemic isolations have let up. 😀
I was just wondering, what kind of dehydrator you use, or whether it’s just your regular oven…Any recommendations?
Looking forward to trying out your recipes! Thanks.
Hey Kay!
Thanks so very much.
If you are going to get into dehydrating seriously I’d recommend a Excalibur dehydrator (that’s what I use and find to be the very best).
Happy trails my friend 🙂
Most of the peanut butter jars I try seem to leak (Jiff, Skippy, etc.). Is the Teddie brand you use any different?
My Teddie Jar has never leaked on me once 🙂
Happy Trails!
I also have problems with peanut butter jars leaking. Any suggestions?
Mine has never leaked on me. I use a Teddy peanut butter jar. Hope that helps.
The backpacker curry meal is perfect. I Made it with 3 oz rice and 3oz lentils..added some red hot pepper flakes too. It’s definitely a keeper! Thanks for sharing
Thanks a ton Joe!
Really happy you enjoyed it. 🙂
I’m heading out on my first multi-day trip in nearly a decade, this week. This site has been an INVALUABLE resource in preparation and I’m STOKED! I will tell you the results when I’m back in a couple of weeks. Fingers crossed for at least mostly dry weather.
Thats so exciting!
How was your trip?
Glad you found the information useful.
Happy Trails my friend.
I cold soaked this year in preparation to hike the JMT. I have stuck with couscous (variety of flavors) for dinner as it packs so small that I can fit 7 days of food in my Bearikade Scout. But I will be happy to ditch the couscous to go on some weekend trips this fall where I plan to bring a stove, have hot coffee and a hot meal at the end of the day.
Another vote for couscous.
Hope you had an amazing time on the JMT.
A trip with the stove can be a nice change of pace after cold soaking for a while. 🙂
Happy trails Ginger!
I’ve contemplated cold soaking on several of my long backpacks but have been curious about research or just personal experience on FD meats or other proteins and the possibility of food poisoning? Any thoughts? Maximum soak time you use to avoid?
Thanks
Wildernessally
Hello Wildernessally.
Cool name!
If the freeze dried meat was cooked fully, dried & stored properly you should have no issues with the possibility of food poisoning.
The amount of soak time wouldn’t have an effect here since it’s not being heating during rehydration.
Happy Trails.
Iron! I’m so stoked to see this. Lugging a stove around hasnt been the best and after reading some PCT books I always wondered what kind of recipes would make for a good cold soaked meal. Really enjoying your blog. Thanks for the trail tips and maybe I’ll see you around.
Thanks a ton Miles,
Look out for more of my favorite cold soaking meal recipes on this page soon. 🙂
Happy Trails!
Two time thru hiker here. Looking at doing cold soak next year for at least a portion of the PCT. Lots of content out on the web about cold soaking, but not a lot of recipes. Thanks for the ideas, and I really appreciate the hot links to the actual items you use.
Hey Bill,
Beyond happy to hear that a seasoned hiking vet as yourself found those recipes & ideas useful.
I will be sure to get up a couple more of my favorite cold soak recipes when I get the chance.
Happy Trails and good luck on the PCT.
Hello Iron, thanks for sharing these amazing stoveless backpacking recipes. I never thought of this idea ever before. I am definitely giving these a try.
Hey Monica,
You are very welcome. 🙂
Hope you enjoy them!
Happy trails.
While hiking long distances, I looked forward to my cold soaked breakfast that is made in a old small peanut butter jar. Pre-mixed rolled oats, mini-chocolate chips, raisins and almonds in a large ziplock bag. Prior to going to bed I would fill the PB jar (3/4ish way up) and fill with water to cover… give it a good shake and wait till morning.
Never really measured anything… just ate what I could and what was easy to consume.
That sounds delicious!
And super easy.
Winning trail combo for sure.
Happy Trails my friend. 🙂
Hey Iron!Long time no see,you must really be living the dream since I never see you working in the field with us anymore!Love this article!I have been trying to simplify my outdoor diet for years and the whole cooking and cleaning process balways wastes so much time,and the weight!I will definitely be trying your recipes out while trekking very soon!Thanks for putting out so many great ideas and your photography!Wow!Keep living the dream Bro!
Hey Shaun!
Good to hear from you. Thanks a ton! Super appreciate that.
I’m stoked you found some of this info useful.
Let me know what you think after giving it a try.
Hope all is well my friend. 🙂
You keep saying “add some water”, but how much? Do you keep track of the amount of water as part of your recipes or just wing it? If you do keep track, could you share the info here?
Thanks for bringing that to my attention Josh,
Just updated the guide with water instructions. Hope you find them useful.
Happy Trails My Friend!
I’m going to give it a try. Thanks – good article
Awesome!
Thanks for taking the time to say thanks. 🙂
Let me know how it goes.
Happy Trails!
I think I like this idea. Gonna give it a try. Thanks for sharing!
Awesome! Thanks for the feedback:)
Would love to hear your thoughts on it after you give it a try.
Happy Trails